
I have made a couple baskets over the last week. I saw people making these rope bowls on Instagram and figured I wanted to get onboard with this skill as well. My LQS has offered classes in the past So I knew they had the rope available for purchase. I bought 4 bundles and quickly zig zagged right through it. Do you ever need a project that just puts you in a creative zone where your spirit is soothed and your mind calmed? These baskets are that project for me.
When I was in college I took a pottery class. I find making these bowls is very similar to throwing pots on the wheel, but much lass messy and (for me) a much bigger success.
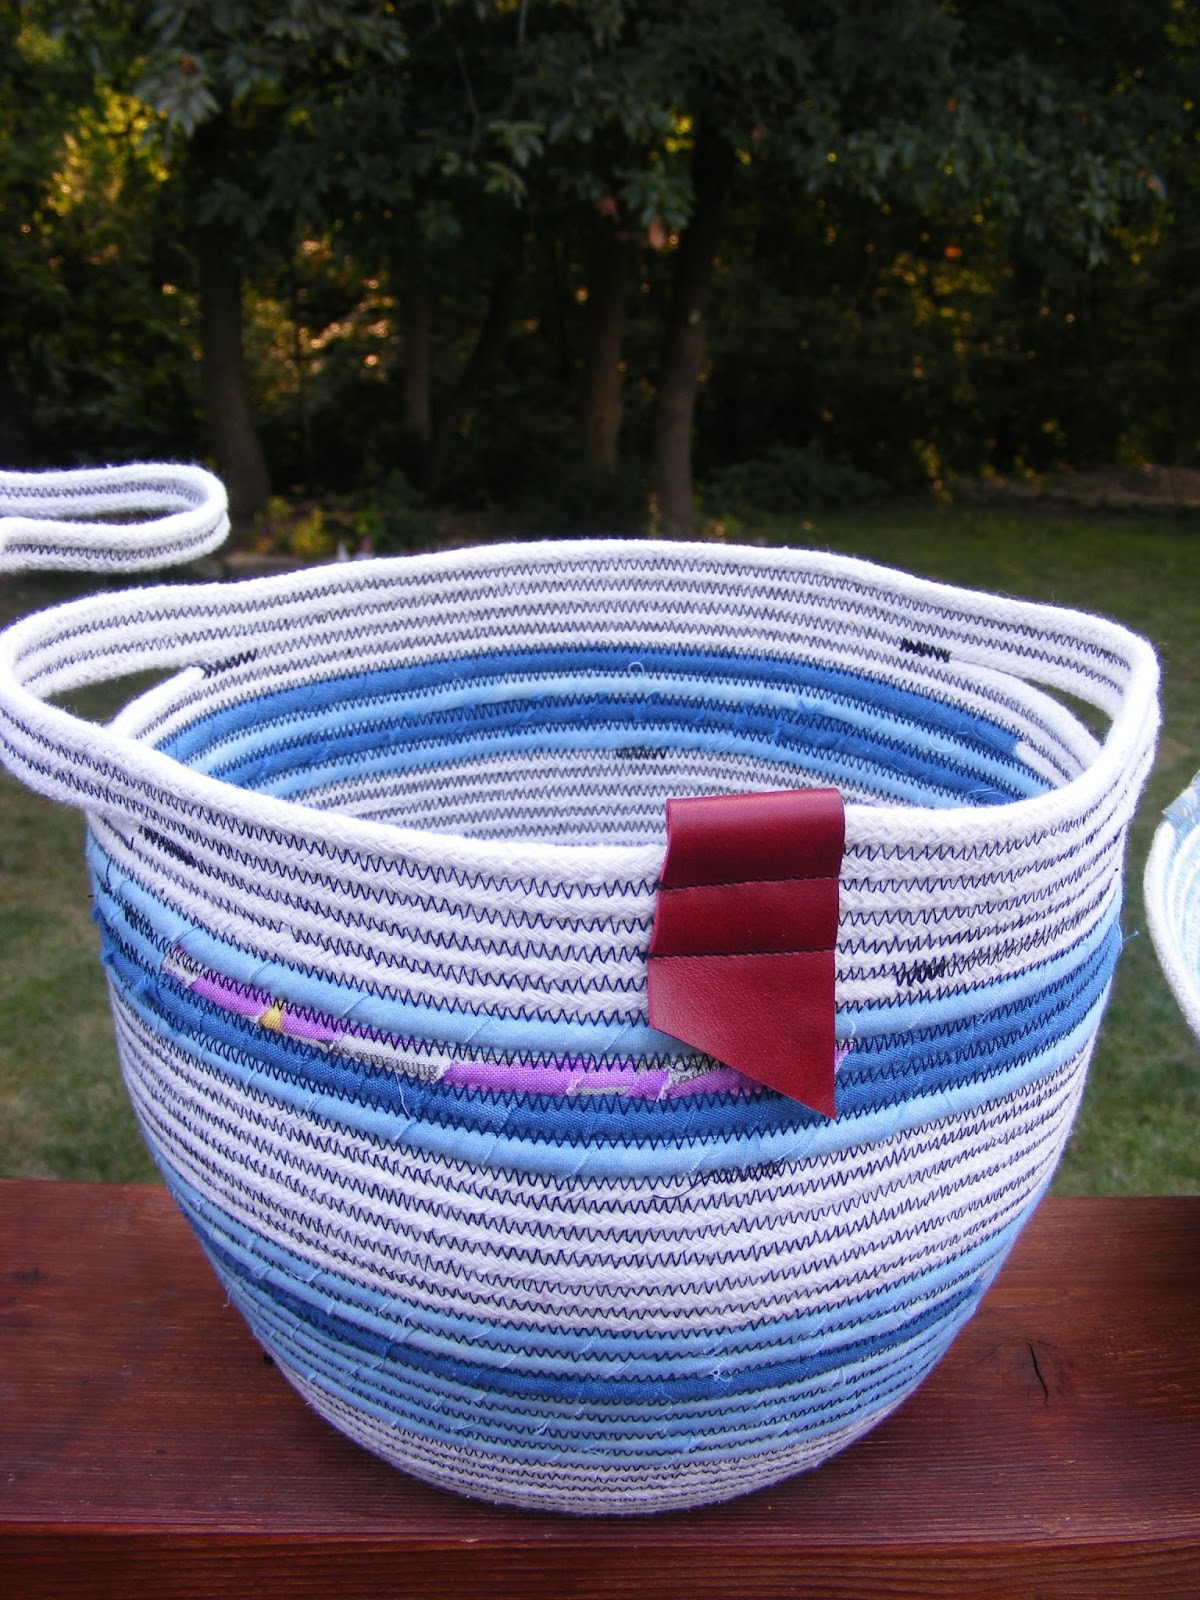
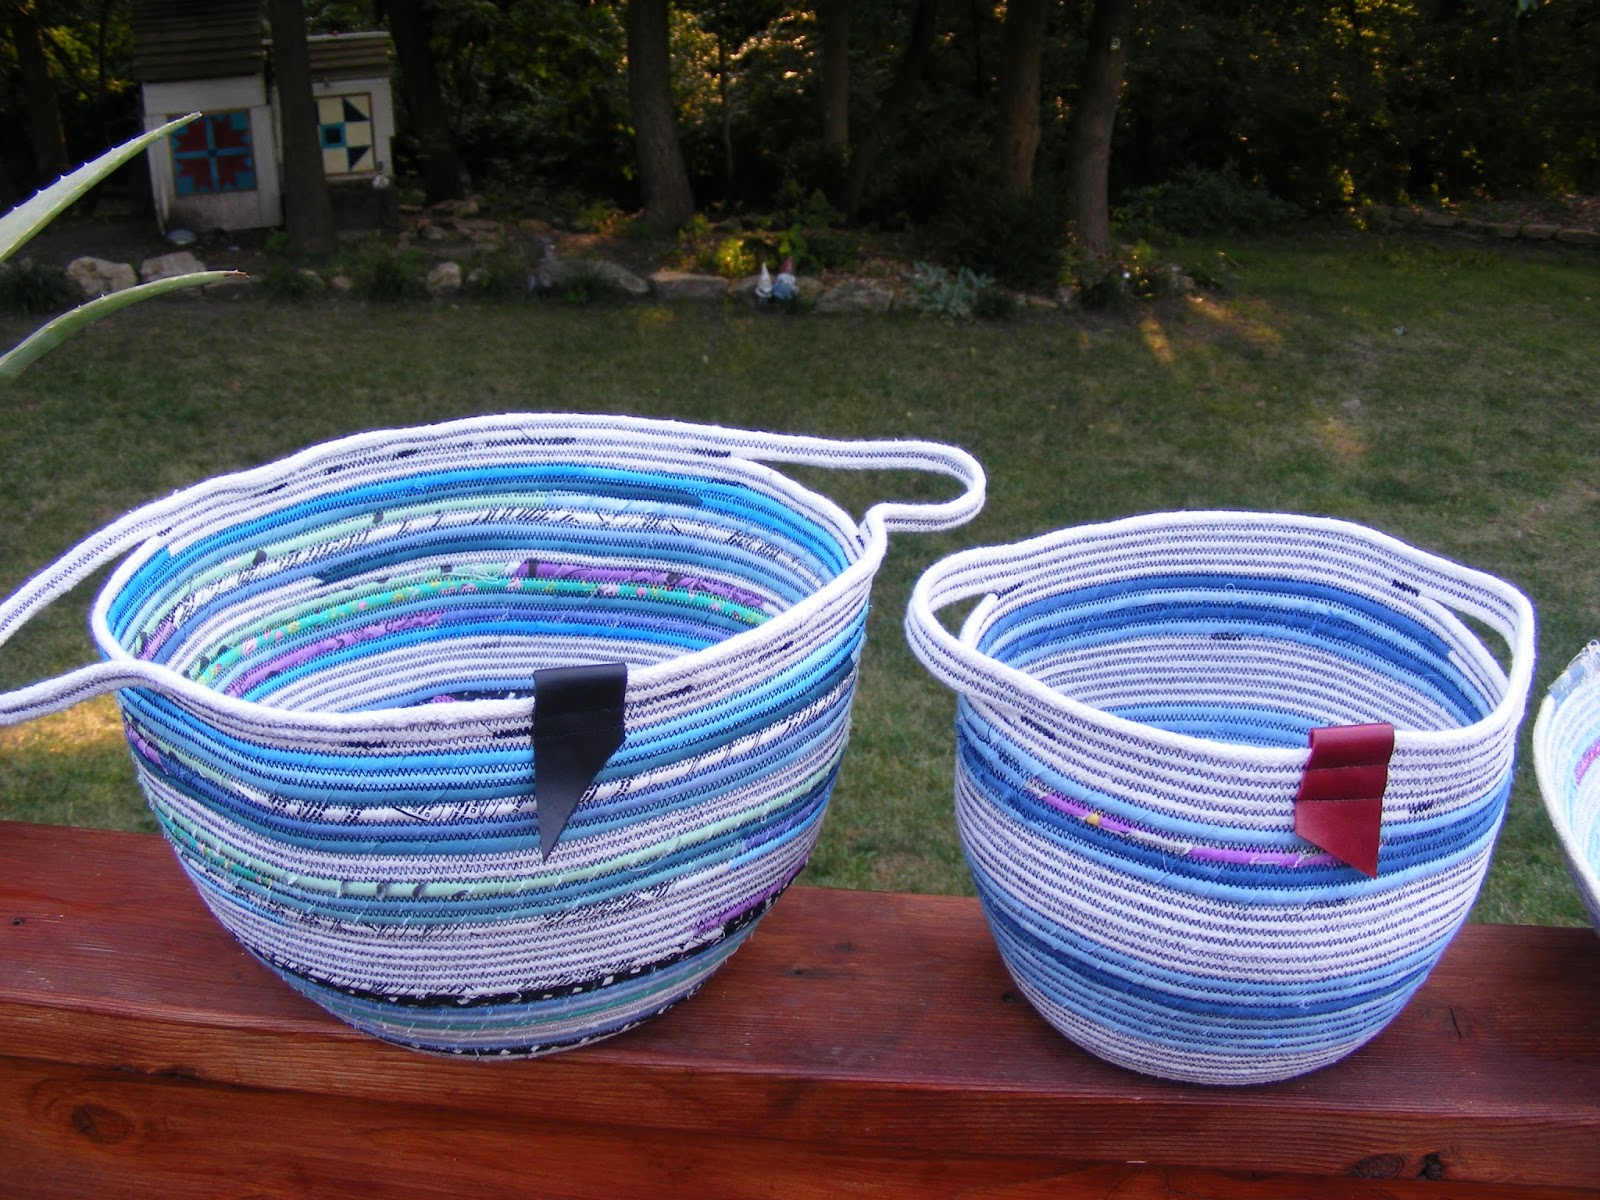
I really loved leaving some of the natural rope uncovered and then wrapping parts with fabric. I feel it gives each piece a bit more artistic quality.

Hello favorite fabrics just peeking out of the basket.

These were so fun, and such an instant gratification project I kept making them. I even moved one of my sewing machines upstairs so I could make the baskets while the kids were doing homework. It is nice to sew with my kids instead of always being down in my quilt lair sewing like a cursed princess in a fairy tale (I actually really love my job and don't mind sewing my days away at all, but it does get a bit lonely from time to time).


If you want to make some too let me share what worked for me.

You will need
- A sewing machine in good working order that has a strong zig zag stitch
- lots and lots of thread
- wind up a bunch of bobbins
- slice up your favorite fabric. I found 1" to 1.25" strips worked the best for me.
- And this Dritz clothesline rope. This is pretty cheap stuff, but my sewing machine handled it just fine.
- I used a little scrap of leather to finish my baskets. I think it looks pretty.

Many of the conversation threads on instagram were talking about all the needles they broke sewing through their rope, but I didn't break one needle. No problems at all.

Begin by making a coil. Do a tight spiral for a round basket, you can make an oval too. Your choice.

And start zig zagging. I didn't start right at the center, I went ahead a bit and came back to the center later when there was more for my feed dogs to grab onto. This machine is my fancy pants Bernina. She is kinda a brat when it comes to doing new things and needs to go into the shop for a good cleaning and servicing, but I don't want to be without her for 2 weeks. That is why some of her zig zag stitches don't look awesome. When I came upstairs to sew I switched to my older Bernina and she made lovely stitches with no drama whatsoever.

So, go around and around and around until you make the size bottom you want. I guess this bottom was about 7 inches. Now tilt the bottom up at and angle to start making the sides.

If you want to wrap your rope with fabric you can do this at any time. For this bowl I started after I had a couple of the side rows stitched. I didn't use anything fancy, I just wrapped my fabric strip around the rope. Don't worry about it being perfect, any mistakes will be hidden in the zig zag stitching.

Add more fabric by overlapping the ends and keep wrapping and zig zagging.

Round and around you go. This bowl is a flared out bowl, but for a more tall sided bowl (or basket) you put your hand under the side you are stitching and that reduces the angle. It makes the sides more straight. It was a little more tricky on the Bernina 820 because her bead is so big. It was easier on my little Bernina.

So, this is an important tip. If your sewing machine foot has mark to indicate the center keep that centered between the coils and the zig zag stitch is more likely to catch both pieces and make a stronger join.

Here I am sewing away when my friends came over and wanted to see how to make bowls. I didn't know Beth was taking my picture, but it was a fun quick demo.

And here is the first rope thing I made, a rag rug! Isn't it great! It is almost all Cotton+Steel fabric. I do love Cotton+Steel. I have a shop full in you need some. You can also get to my shop through my side bar widget. OK, go forth and get rope and sew up some baskets! Let me know if you have any questions in the comments and I will answer them ASAP.
Ok, I have quilting to do. I have been quilting some great quilts. Lots I can't show right now, maybe in a couple months.
xo,
Tia
How do you finish the bowl when you get to the end? I am looking for this exact kind of creative experience! Love it and to use scraps! Oh. Do you have to have your strips sewn together?
ReplyDeleteI like to finish my bowls with a backstitch and then cover the raw end of the rope with a little scrap of leather. I have tired to finish them a couple other ways but I like the leather the best. I think it looks a little professional. And No, I do not sew the rows of fabric together. If you look closely at one of the pictures up there you will see me adding a strip of fabric onto another. I just do a little overlap and keep wrapping around and around.
DeleteVery cool! Thanks for sharing your know how.
ReplyDeleteAren't these things addictive??!! I spent the Fall of 2012 making them - gifts, to sell, to enjoy - and could hop back into it in a NY minute! Thanks for sharing!
ReplyDeleteI love these! I love how you left some of the rope sans fabric. I also love that you used a bold thread color instead of trying to match the fabric. These are very artistic and adorable!!
ReplyDeleteI love these! I love how you left some of the rope sans fabric. I also love that you used a bold thread color instead of trying to match the fabric. These are very artistic and adorable!!
ReplyDeletegreat works Tia...i love how you finish them with handles or circle-y things.
ReplyDeleteTia thanks so much for this tutorial can you explain how you make the handles?
ReplyDeleteI’ve started to make these for Christmas gifts.fun and pretty but I’m having trouble getting any of the to have tall straighter sides. How do you accomplish that?
ReplyDelete