Long Arm Quilting

Friday, June 27, 2014

Secret Garden Quilt Pattern!


Hey there! I am excited to announce that my Secret Garden quilt pattern is available for free download! Isn't that awesome! Click on over to the Cloud9fabric website and download it asap! This is a super quick and easy quilt to make. It isn't too big to quilt on your domestic, or send it to me and I will do it for you ;o).


I used Sarah Watson's beautiful Arcadia fabric to make this quilt. The solids I used were Modern Solids. They have such a complimentary weight to them when used with Cloud9's organic cotton fabric.


I would love to see your quilts if you make any from this pattern!

xo,
Tia Curtis

Tuesday, June 24, 2014

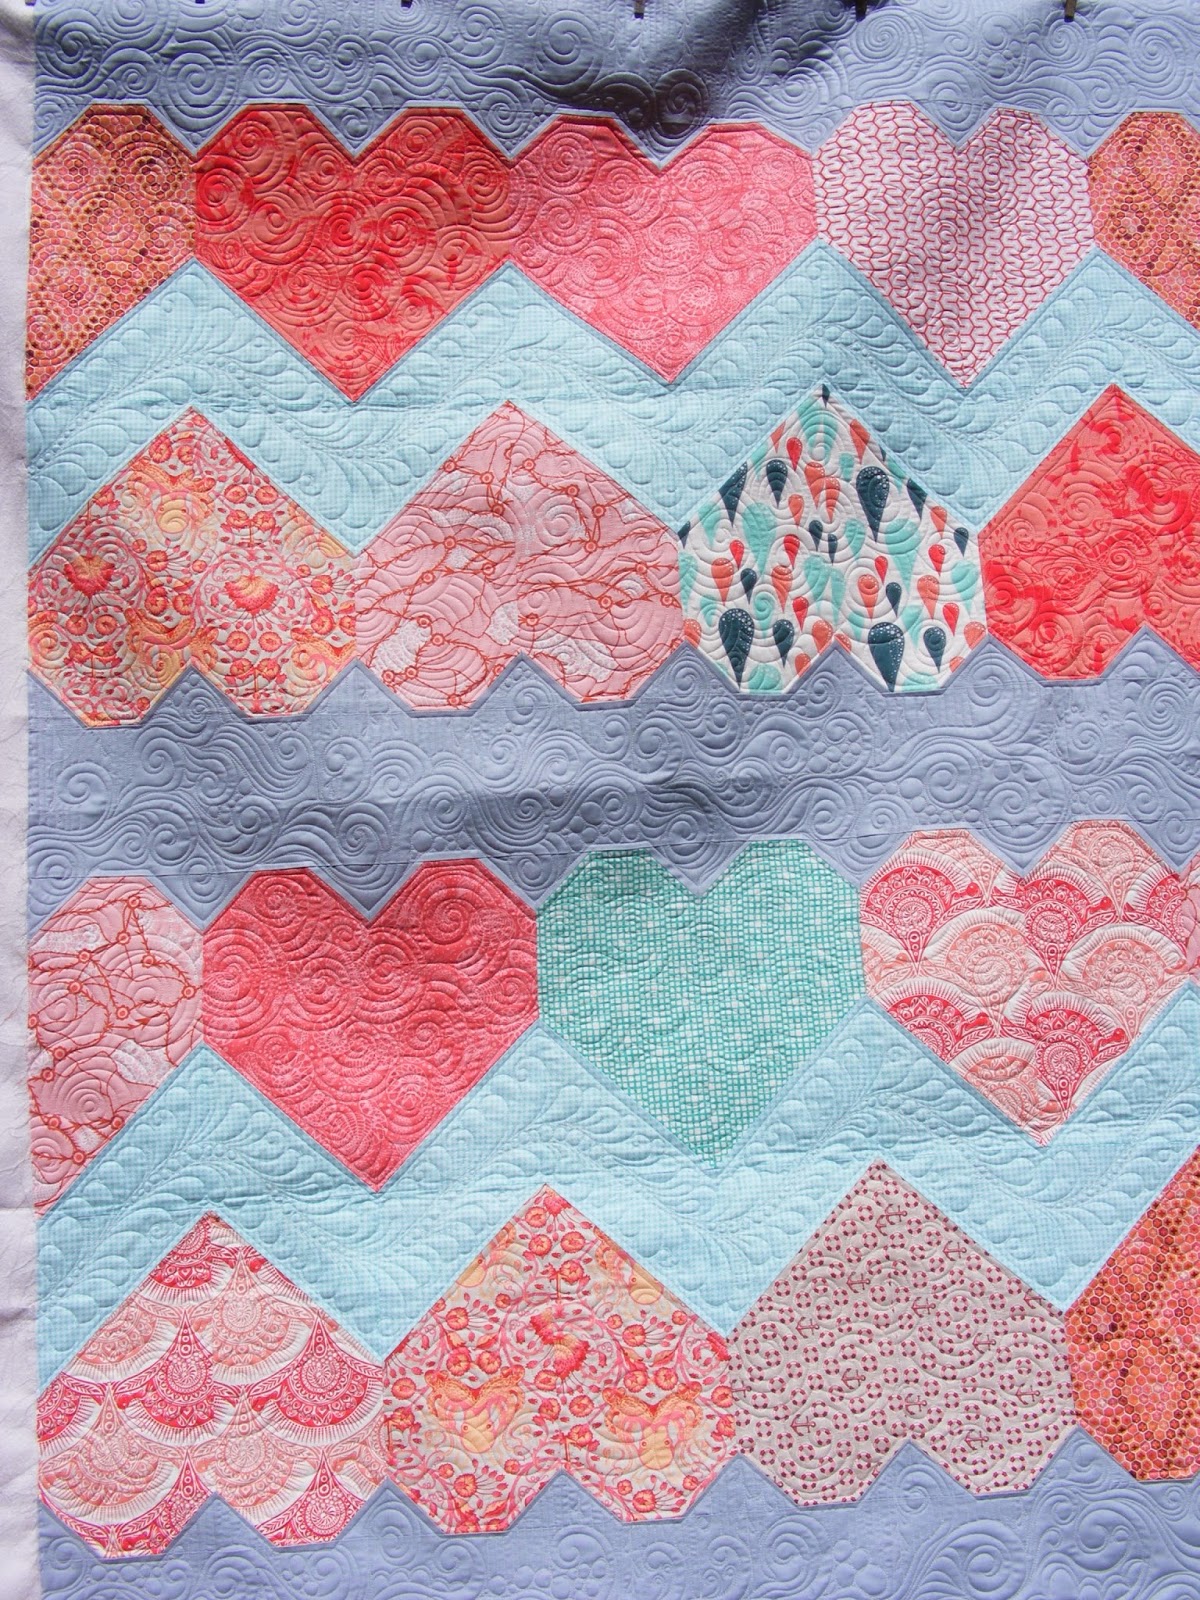
A pretty quilt for Joy


Here is one of my latest custom finishes. This was such a fun quilt to quilt. I kinda wish it was bigger.


I quilted three of my favorite basic freehand designs. "Wind and Rain", "Echo swirls" and "fancy feathers".


Did you know that swirls in welsh quilting represent eternity? I think this works well with this love heart quilt.


This is not the best shot, but I quilted little raindrops above some of the swirling wind gusts.


I love the pieced quilt back that Joy made.

I am pretty happy with how this quilting turned out. Now onto some more traditional quilts. I love my job, folks!

xo,
Tia

Sunday, June 8, 2014

Quilts of the week


Hey there folks! Summer is well and truly here. I quilt in the mornings and take the kids to the pool in the afternoons at about 3. I am pretty pleased with how productive I have been. I work on quilt design and pattern writing while I am at the pool and I even taught a free motion 101 class yesterday. How about we look at some pretty quilts?


This gorgeous bed runner is a paper pieced pattern named Bali Star Wedding ring (the pattern is by Judy Neimeyer). This was a really fun one to quilt. Most of the quilting is Statler Stitcher (computer guided) but there is plenty of hand guided work as well. Mari did such a great job with her paper piecing and I love how the batiks just glow!


It actually went a great deal faster than I thought it would, but I guess that is due to the smaller size. A large quilt like this would take a long time.


The back is pretty too.


I love this quilt too! It is a Gypsy Wife Quilt (pattern by Jen Kingswell). This was another really fun quilt.


It is entirely stitched in the ditch...and then I added a bit of detail quilting to different portions of the quilt.


It is hard to see the quilting, but it is there!


This one is a Nest Quilt by Shari. It is semi custom quilted. An edge to edge in the center and separate hand guided borders.


I always love Shari's pieced backs, and I notice that this quilt is hung for photography sideways.


Last quilt for this blog post is this fabulous enormous 9 patch. It is custom quilted and took 3 days. For me that is a pretty long time.


A classic 9 patch is such a great quilt. This one is so happy!


It was a fun quilt to quilt. And I love how it turned out! 


This quilt is going to have so much texture when it is washed!

Saturday, May 31, 2014

Keeping Chickens


Our family has been keeping chickens for almost a year now. I wanted to have them ever since living in Australia when all our neighbor thought we were nuts for NOT having chooks. Well, I have been converted and we all just love our little flock of characters.


Their coop is located down in a little shady spot in our backyard. They get to free range around the yard when we are out with them (too many hawks, neighbor dogs and eagles in the area for them to fee range all the time).


Right now we have 7 laying hens. Our ladies are breeds selected for their egg laying skills.


Our hens are Brahma, Golden Comet, Cinnamon Queen, Road Island Red, Aracuna, one silly Polish hen and a Black Sexlink named Midnight.


During the day they come and go from their coop. At dusk they put themselves to bed up in the roosting room and we lock the coop behind them.


This is their nesting box. They all fight over the same spot to lay their eggs. This particular hen has "Gone Broody" She is desperate to hatch out some chicks and refuses to leave the nesting box. We do not have a rooster so the eggs are all unfertilized. YOU DO NOT NEED A ROOSTER FOR EGGS. Poor Michelle. We felt sorry for her and traded 3 of our eggs for my friends fertilized eggs. If Michelle can stick with her broody nature for 21 days she will get to have 3 chicks to tend. She is very excited about motherhood.


This is the back of the coop. The doors open so we can clean the poop out and change the bedding. We switch back and forth between wood chips and straw for bedding. The ladies don't seem to care.


They get to eat a mix of whole grains (this time I bought millet and whole wheat. Sometimes I get oats). They happily eat table scraps and dandelion leaves when I weed. Their very favorite food is bugs and worms. You haven't lived until you watch a fat hen chase down a grasshopper. It is hilarious.


I also feed the hens Layena feed. This is the crumbles. I won't buy crumbles again because they make too much of a mess with it. I prefer the pellets.


We keep our hens for fresh eggs, bug control, weeding and the peace we get from watching them cluck around the back yard. Here is a comparison of one of our eggs (the big orange yolk on the right) and one I bought from the store. The store egg was labeled as a free range, organic vegetarian egg. It looks rather puny to me.

Chickens are lots of fun and if tended well they really don't smell bad. Dog poop smells much worse than chicken poop. Anyday. My family has learned so very much taking care of these birds. They each have a different personality

xo,
Tia


Thursday, May 29, 2014

Teacher Tote Bag 2014 - A tutorial

Hey there! 
I made bags for my kids teachers this year. I have been asked for a tutorial over on instagram, so here it is! This is a really simple tote bag. I did not quilt it, but it would look great if you felt like taking the time to quilt the body of the bag. That would be a great option for customizing it for yourself.


Bag Ingredients:
  • 35 x 22 inch piece of denim or heavy weight fabric for body of bag
  • 10 x 22 inch piece of denim for long pocket
  • 10 x 9 inch piece of denim for the pleated pocket
  • 35 x 22 inch piece of fabric for the lining of the bag
  • 52 inches of heavyweight 1.5 inch wide twill tape
supplies:

  • rotary cutter
  • sewing machine
  • cotton thread
  • chalk pen
  • iron
  • pins
  • sewing machine foot for sewing through thick fabric seams. I used my Bernina Denim foot.
*the pictures are not the best. Please ask questions if you can't see due to my dark basement studio lighting


after cutting out your pattern pieces plug in your iron. For both pockets I flipped the denim over and used the lighter side to give it some contrast. For the long pocket press the bottom under 1/4 inch and press the top part under twice. Top stitch the the seam in place. On one of the bags I added some rickrack during this step...but I was running behind and wasn't wild about the result.


Find the center of the bag. I marked the center with a chalk pen and marked lines 3 inches on each side of the center. This line is important so you know where to place the pockets. Pin your long pocket right on the chalk line. Sew along the bottom of the pocket. You don't need to sew the sides of the pocket because you will make the sides when you sew the sides of the bag.

I thought this piece was to long to be just one pocket so I made it two by making a pen slip at the center point. This was easy by just stitching a tiny divider at the center point.


The pleated pocket is easy to make with pressing and pins. Press the top towards the light side by folding over twice. Press the sides towards the dark side by folding over 1/4 inch. Make your pleat by pinching the center of the bottom and finger pressing it so the fabric makes a pleat. Pin the pleat in place and press with a hot iron. Fold the bottom of the pocket up about 1/2 inch and press with a hot iron. The ironing should be enough to hold the shape of the pocket until you can sew everything down.

Pin the pocket to the body of the bag and stitch down. This is a good time to change your machine foot out to one that easily sews through multiple layers of fabric.


I try to make the straps early on because I hate making straps and just want to get it over with. Fold up the bottom of the twill tape, finger press and pin. You can stitch this down or not. If you don't it is no big deal, because you will catch everything when you sew the bag down to the body of the bag.


Sew down both sides of the body of the bag and the lining. When you sew the lining leave a 6 inch gap in one of the side seams so you can flip the bag right side out. See the next couple pictures if this is confusing.

You will also need to box off the corners of the bag to make gussets. I made my gussets 6 inches.


See - here is the opening I left in the side of the lining.


Pin or clip the lining to the body of the bag. Make the body of the bag right side out and make the lining inside out.


Marry up the side seams of the lining and body.


Sew all the way around the top of the bag.


Flip bag right sides out and stitch up the opening in the lining. Press the seam, then top stitch around the top of the bag a couple times. I thought four lines of stitching looked pretty.


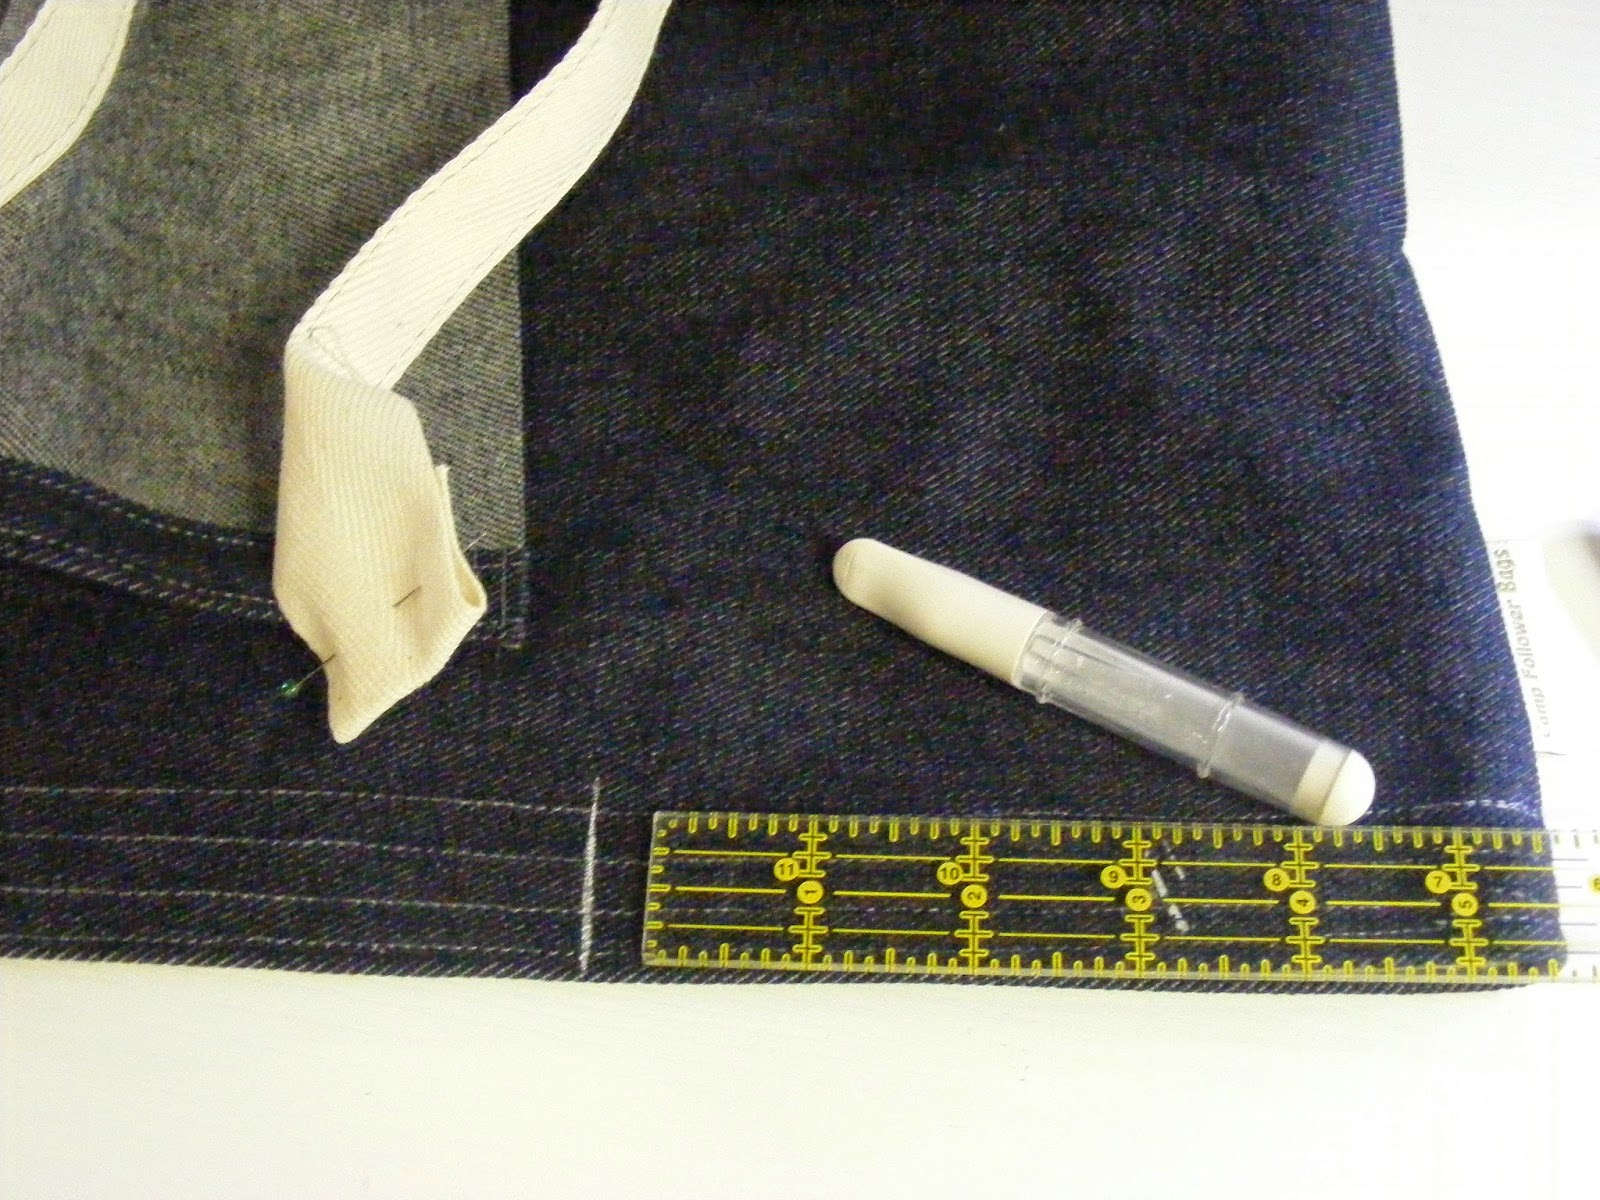
Now for the straps. Use your ruler and chalk to mark a line 5 inches from the side seam. Place your strap to the inside of the mark and sew your strap in place. Do this with both sides of the strap.


You can make a strong box (a stitched box with an X in the middle) or just go back and fourth a bunch of times. What ever you like the best.


Bamm! You are done. Make lots of them and give them away. Show me what you made and share the tutorial with your friends. Please asks questions if something isn't clear.


It would be easy to add pockets inside, but everything in my bags winds up lost in a snarl at the bottom anyway so I didn't mess with it.

Happy sewing folks! Let me know what you think and I will do more tutorials.

xo,
Tia Curtis