Long Arm Quilting

Tuesday, September 25, 2018

I'm Still here! Still quilting.

Hi There!
It has been a long time hasn't it? So much has been going on with my family and so much quilting has been going on as well. About May my husband decided to take a job down in San Antonio. Needless to say that meant a move, putting the house on the market, making renovations, selling the house buying a new house, packing all our stuff up, selling our absolutely awesome flock of hens, saying good bye to friends, making new friends, saying farewell to the best quilt guild in the world, and getting a heap of quilts quilted. Some of that did happen. Most of that happened actually. I did send my husband to Texas without me to try on the job and city and see if he actually liked it before moving us all back to Texas. We did make a ton of renovations to our house and we put it on the market. I packed up almost my entire studio and most of the house, sold and gave away so much fabric and sewing machines and just STUFF. I quilted my entire rack of client quilts, I wrote some quilt patterns, planned so many classes, trunk shows and workshops for next year and we said goodbye to dear friends. But.....then we didn't move. Turns out we were not fans of a massive city and my husband wasn't a fan of the new job, so we stayed in Leavenworth, Kansas. I got to experience all the emotions. I got to start taking a new blood pressure medicine. I can't find half my stuff that is still packed up in the garage and I am still trying to catch up on the whirlwind that was this summer. It was hot and stressful and so so so productive. If you follow along with my Instagram feed you will know some of the madness we have been putting on ourselves.

I am just going to show some pictures of the quilts I have quilted. Please ask questions if you want to see more of them...heck some of them I may have shown before. If so they are pretty and you get to see them again.


 I quilted this one to be cut up and made into bags. I made 6 bags out of it already.


This is Lori's version of my BOEOM quilt. Isn't it cute? 


One of my own quilts got in the mix. This is a class sample for a couple classes.


I really love this quilting I did on Konda's quilt. Sometimes it takes a long time to figure out what I want to quilt on a quilt, but this one was so fun and easy. I knew exactly what I wanted to do with it.


Another or Klonda's quilts. I love this black on black quilting. so puffy and wonderful.


This was a neat one. I quilted the lyrics to a couple Wicked songs on this quilt. The texture of my handwriting makes a neat element.


And I have been raising these clowns. They have grown up so much. Seems like just yesterday they were little. I think they are my best work really.

OK, back to work! If you saw something you want more info about just let me know in the comments or email me.

Cheers!
Tia

Tuesday, May 22, 2018

My Block Of Every Other Month Quilt is finished!

Hi There Folks!

I hope you are all doing well. I have been busy quilting as usual. I have been traveling to teach and do trunk shows too. That has been quite fun. Earlier this month I squeezed my own quilt into the Custom quilt queue. It was super fun to quilt. I don't make many quilts these days as I spend most of my time quilting for people. While I was making this quilt I knew how I wanted to quilt each section so the quilting went quite quickly. I think the quilt needs a different name than #KCMQGBOEOM What are your ideas for a different name? I stink at naming quilts.


Here I am in my sunny studio. I have a basement studio too. My quilting business has swollen to take up quite a bit of the house. If we ever move I think I need an out building to set up shop it. Oh and that fluff ball under my arm is my daughter's cat Ragnar. He is a dream boat.  All the tutorials for this quilt are here on my blog and over on my Youtube Channel. If you make blocks from my tutorials I sure would LOVE to see them. Please tag me on Instagram, or send me a picture. I will happily make more tutorials if I see that people are using them. Its a little vainglorious to just write posts that no one reads or is inspired by. So sound off if you are here. Now, lets look at pictures.


Almost ALL the fabric in this quilt is Cotton+Steel from my shop. Go get some for yourself if you like. For the next couple days you can use the code SUMMERBREAK to get 15% off your fabric purchase of $25 or more. There is some great stuff in the shop and more on the way.


I used 2 layers of batting. Quilters Dream Blend on the bottom and Wool on top. Using two layers of batting creates a false trapunto look. The un-quilted bits pop and it looks more fancy. The quilting can really show off.


The whole quilt is quilted with Glide thread in the color Tar Heel. Not only is it a great color, but I like the name too.


I did a little curved crosshatching because it is fun and I don't do it very often. I love Linda's rulers from The Quilted Pineapple. They are the best I have ever used.


So there you go. Everything I can think of about this quilt. Please ask questions if any spring to mind.

Cheers!
Tia

Wednesday, March 14, 2018

Modern Arch Block Tutorial


Hey there! Are you ready for the last block in the KCMQG Block or Every Other Month? I am. I won't lie...I never take this long to make a quilt and its kinda driving me nuts. I don't like dragging things out. I am a woman of action and I want things made and done. boom.


This was a hard block to name. I took it to the Instagram hive mind because all I could come up with was "Humpy Block". While I love the block and I think they are really fun to make my daughter told me they looked like ogre fingernails...and if you butt them together they look kinds like pills or lady parts. Funny how it goes when you are so pleased with how something turns out and then to get someone else's opinion on their appearance it totally changes how you feel about them. Boo. I think they look like the fantastic Olga mountain range in The Middle of Australia. If you want to read more about that trip you are welcome to read about it on my old blog Camp Follower Bags. Its a funny story and my kids were so so so cute! I also wanted to name them the "Olga Blocks" but I figured no one would understand so without further ado I have named this last block "the Modern Arch" Thank you so much for helping me name it.


Of course I made a bunch of them. These blocks are both pieced and appliquéd. The appliqué is a small bit so it is easy and a great place to begin if you are new to needle turn appliqué. You are also welcome to just use raw edge appliqué or fusible. These will be your blocks, do them however you please.


Here is one of my aboriginal paintings of the Olgas. See how they are fabulous rounded domes? Such a magical place. The Artist who painted this piece is named Rooth,


I have several Aboriginal pieces and I love the swirls and curves...I bet you can see it reflected in my own quilting can't you?

Modern Arc Tutorial


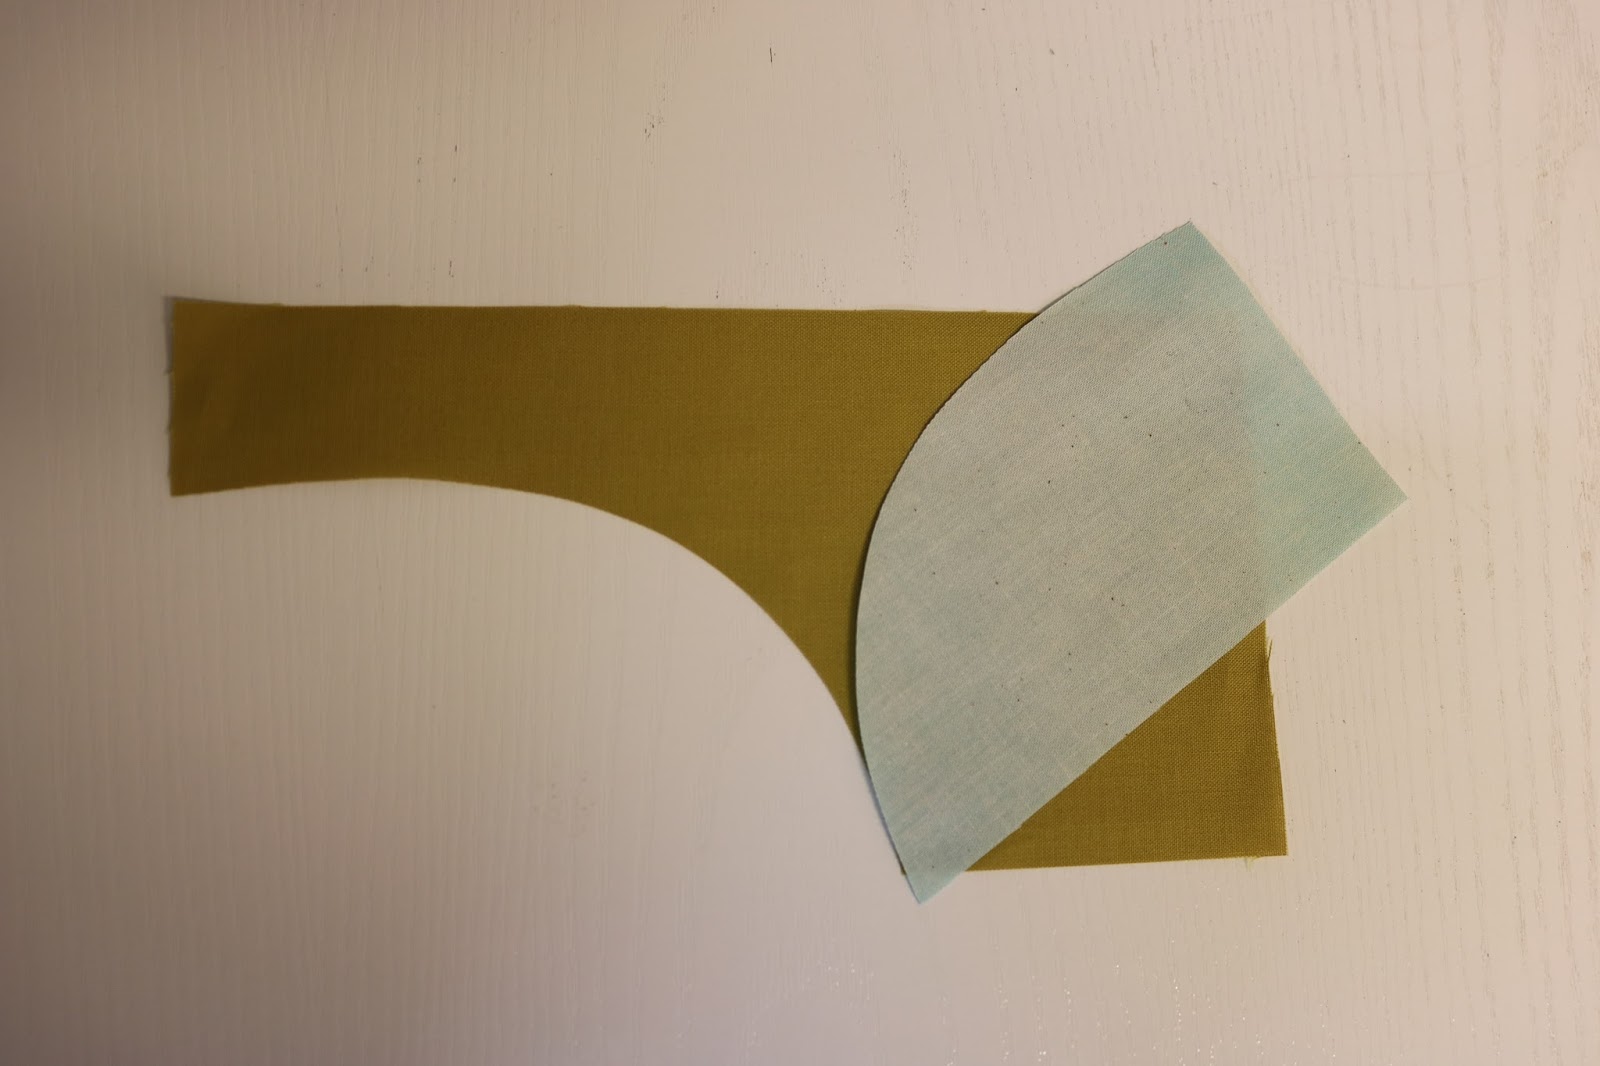
Start out with two sets of rectangles. Overlap them. One will be the right side and the other will be the left side.


Cut an arc while the blocks are overlapped. If you are uncomfortable free cutting with your rotary cutter, you are welcome to draw an arc and use that line to cut on. Don't worry if they aren't symmetrical, I think the asymmetrical quirkiness is what makes these so fun. You do need to leave at least a half inch on the far edge so you can piece the Arcs without loosing your curves...unless that is the look you are going for.


To piece the curve you need to have a bit of an overhang of the inner piece.


I don't pin the block I just go for it and ease the curve in as I go.


As you can see you will have some waste that you will need to trim away. Thats fine. You can stop here or add another inner curve.


Do it the same way. Overlap another square or rectangle and cut a curve a so the curve angles match the piece you are sewing them into.


If you notice there is no way you will get the center seam to match up feel free to piece in a scrap and make it straight. You are in charge of these blocks.


Now for the piece that you will be appliquéing. Cut an arc that is smaller that the last one you stitched in.


I like to make a basting stitch about 1/4 inch from the edge and then I use my needle to tuck the seam allowance under. That basting line acts as a barrier and helps keep the proper shape.


Maybe this picture shows you what I mean?


Trim the fabric beneath the appliqué if you can. I do this because it makes for less layers when I quilt it and if the fabric is darker under it will make a shadow that might be ugly.

OK.... go forth and make some Modern Arch blocks. I Sure would love to see what your look like. If you make them tag me on Instagram.

XO,
Tia Curtis