Long Arm Quilting

Showing posts with label quilt block tutorial. Show all posts

Wednesday, March 14, 2018

Modern Arch Block Tutorial


Hey there! Are you ready for the last block in the KCMQG Block or Every Other Month? I am. I won't lie...I never take this long to make a quilt and its kinda driving me nuts. I don't like dragging things out. I am a woman of action and I want things made and done. boom.


This was a hard block to name. I took it to the Instagram hive mind because all I could come up with was "Humpy Block". While I love the block and I think they are really fun to make my daughter told me they looked like ogre fingernails...and if you butt them together they look kinds like pills or lady parts. Funny how it goes when you are so pleased with how something turns out and then to get someone else's opinion on their appearance it totally changes how you feel about them. Boo. I think they look like the fantastic Olga mountain range in The Middle of Australia. If you want to read more about that trip you are welcome to read about it on my old blog Camp Follower Bags. Its a funny story and my kids were so so so cute! I also wanted to name them the "Olga Blocks" but I figured no one would understand so without further ado I have named this last block "the Modern Arch" Thank you so much for helping me name it.


Of course I made a bunch of them. These blocks are both pieced and appliquéd. The appliqué is a small bit so it is easy and a great place to begin if you are new to needle turn appliqué. You are also welcome to just use raw edge appliqué or fusible. These will be your blocks, do them however you please.


Here is one of my aboriginal paintings of the Olgas. See how they are fabulous rounded domes? Such a magical place. The Artist who painted this piece is named Rooth,


I have several Aboriginal pieces and I love the swirls and curves...I bet you can see it reflected in my own quilting can't you?

Modern Arc Tutorial


Start out with two sets of rectangles. Overlap them. One will be the right side and the other will be the left side.


Cut an arc while the blocks are overlapped. If you are uncomfortable free cutting with your rotary cutter, you are welcome to draw an arc and use that line to cut on. Don't worry if they aren't symmetrical, I think the asymmetrical quirkiness is what makes these so fun. You do need to leave at least a half inch on the far edge so you can piece the Arcs without loosing your curves...unless that is the look you are going for.
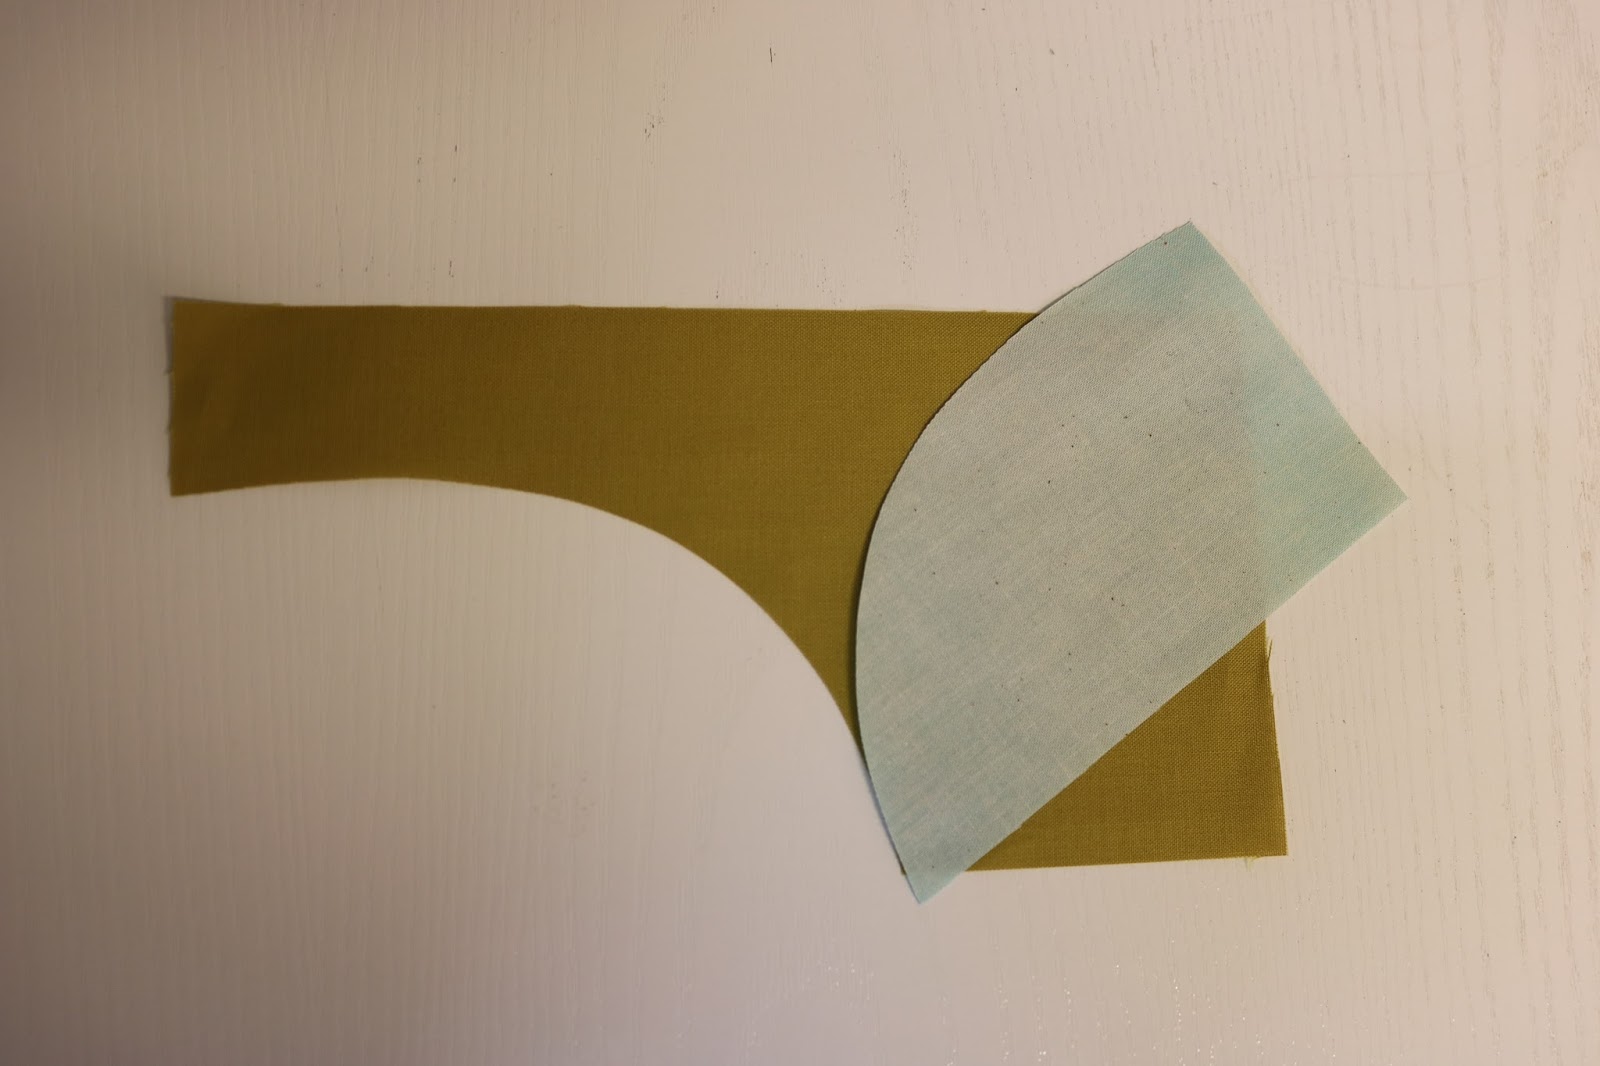

To piece the curve you need to have a bit of an overhang of the inner piece.


I don't pin the block I just go for it and ease the curve in as I go.


As you can see you will have some waste that you will need to trim away. Thats fine. You can stop here or add another inner curve.


Do it the same way. Overlap another square or rectangle and cut a curve a so the curve angles match the piece you are sewing them into.


If you notice there is no way you will get the center seam to match up feel free to piece in a scrap and make it straight. You are in charge of these blocks.


Now for the piece that you will be appliquéing. Cut an arc that is smaller that the last one you stitched in.


I like to make a basting stitch about 1/4 inch from the edge and then I use my needle to tuck the seam allowance under. That basting line acts as a barrier and helps keep the proper shape.


Maybe this picture shows you what I mean?


Trim the fabric beneath the appliqué if you can. I do this because it makes for less layers when I quilt it and if the fabric is darker under it will make a shadow that might be ugly.

OK.... go forth and make some Modern Arch blocks. I Sure would love to see what your look like. If you make them tag me on Instagram.

XO,
Tia Curtis

Saturday, February 10, 2018

Crazy Daisy Tutorial - BOEOM #7

HI There!

Welcome to another episode of the Kansas City Modern Quilt Guild BOEOM (Block Of Every Other Month) We are on block 7 - the Crazy Daisy!!!! This is a super cute block that is fun to make. As you can see below this is what my quilt top looks like. I have finished the top so you can see where we will be going from here. I didn't do a video this month...too much was going on and I just couldn't find the time to plan it out. An old fashioned picture tutorial will have to do.


Here are the Crazy Daisy blocks. One has a pieced center and one has an appliqué center. I think both are fun, you choose what you like best.


April I will show how to do the hump blocks. I am not wild about that name, so if you have a good one let me know. They are really fun and surprisingly versatile depending on how you use them.


So here is the finished block. I trimmed mine to 6 inches, you can trim yours smaller if you like. I also fussy cut the center, it looks great if you aren't fussy, but I felt the need to make it just a little more complicated. Its the way I roll.


I like to strip piece. So I cut my pieces as WOF (Width of Fabric) and make several blocks at one time since I am sitting there anyway. This set of instructions is for just one block.

You will need:

  • One 6" x 6" background square
  • Two 2.5" x 4.5" rectangles
  • One 4.5" x 4.5" square of fabric you would like for your daisy
  • One 1" x 1" square for the center of the daisy


Sew the two background rectangles to two opposite sides of the daisy colored square. Press the seams.


Sub cut the pieced bit into four 1" segments. There will be a tiny bit of leftover.


Cut the 6" background square in half diagonally.


Sew one of the petal pieces into the cut. Press the seams towards the background for this first petal. The rest of the  daisy seams will be pressed towards the petal pieces.


Cut the piece in half again on the diagonal.


Sew another petal piece into the cut and press the seams towards the petal piece. I think the block looks pretty great at this point. If you ever need an X block, here you go.


You can piece the center of the daisy anytime. Just cut one of the petal pieces in half and sew the 1" center into the cut. Press the seams towards the petals.


Cut the flower again in half through the center of the X and piece in another petal. Press the seams toward the petal piece.


Cut the flower piece in half one more time. The center of the last petal piece should nest perfectly with the previous piece. Here is a bad close up picture with pins (even though I don't really pin this block in real life).


This is what your Crazy Daisy block should look like.


Here is a picture of the seam side. I always think it is helpful to see the seam side. You can see how the first petal piece was pressed towards the background, but all the other seams are pressed towards the petals.


Last step is to trim the block. I trimmed the block to 6 inches, but you can certainly trim it smaller or even make it asymmetrical. You can do a lot with this block. The petals don't have to be even sizes, you can make them wonky or when you cut the block to piece the petals you can cut is crazy. That is fun too. I tried hard to make this one nice and symmetrical so you would all be impressed. In real like I make mine pretty wild.

OK, have fun making these! I would love to see yours on Instagram. Just tag them with #KCMQGboeom. Yay! Oh and lat me know if you have any questions in the comment section.

Cheers!
Tia